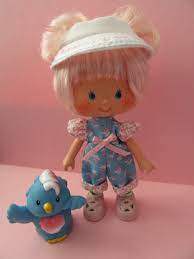
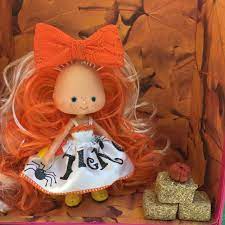
Thanks to Elise from My Little Customs for producing this excellent guide
Nylon is one of our favourite types of hair. Nylon is probably one of the most versatile hair types you can work with when customising. Not only does our nylon have the finest denier of nylon’s out there, it takes almost any hairstyle with no issues and you can use heat to help get desired styles.
However what you may not know, is that you can actually dye nylon hair. That’s right!! You can make your own coloured nylon very simply using fabric dye!
This tutorial will cover the basics of dyeing hanks of nylon hair :).
Before you begin however it is important to understand that ONLY nylon and saran hair will dye with fabric dyes. Want to check the hair you are using is nylon, you can determine this with a few simple tests.
The reason I mention testing the hair is because some colours of POLYPROPYLENE are very similar to nylon in look, feel and texture, and it would be a waste of your time and money to try and dye polypropylene.
Nylon is a porous synthetic hair, meaning that it will quite easily take fabric dye whereas polypropylene is non-porous and therefore has no way for the dye to penetrate it and take on the colour. However because of these differences in porosity it makes it very easy to test the difference between the two hair types. So how do you test between the two types of hair you ask? Here’s how :). THE FLOAT TEST.
This test doesn’t get much simpler, if you are confused as to whether you have a poly or nylon hank, then simply snip a small amount of hair into a bowl of water. As mentioned above as nylon is porous it will absorb the water and sink to the bottom of the bowl, as poly is non-porous it cannot absorb the water and will always float. SIMPLE :).
To tell the difference between saran and nylon is also very easy and this can be done by eye and feel. Nylon is a very fine hair with a slight texture to it, compared to saran which has a silky smooth texture, heavier weight than nylon and a slightly greasier waxy feel to it.
Now that you know how to tell the difference between the hair types you are now ready for the fun part and dyeing your nylon hanks :).
Dyeing nylon is all about having fun and experimenting, I am never quite sure how the results will turn out, but I find that part of the fun, and found that some of the hanks I have dyed have come out more beautiful than I expected. Although you can effectively dye any colour of nylon, light colours will always yield the best results with our whites giving you the most vibrant and variation in colour.
Before you begin first gather your equipment;
Equipment needed:
- Hanks of nylon hair (white will give you the best results)
- Fabric dye (I use powdered dyes such as Dylon and RIT dye, although I see no reason why you cannot use liquid fabric dyes as well)
- Small bowl
- Spoon
- Stand of some sort (I used our banana tree)
- Old hair band
For this tutorial I used 1 hank of white witch (see picture 1) and 1 small packet of powdered Dylon fabric dye in Flamingo Pink.
- Firstly prepare your hank of hair, you want to make sure it is clean and knot free. Knots will cause your end result to become uneven.

- Now make up your fabric dye in your bowl, making sure to stir it thoroughly with the spoon so that no powder remains in the bowl. You can read the instructions on the back of the packet, however these are generally designed for dyeing larger articles of fabric. When I dye the hair I either use less of the powder and save the rest for another job, or I use the whole packet but in a lot less water. Using the whole packet in less water will give you a stronger end colour result. This is also the time to add in your salt /fixative agent (please follow the manufacturers instructions on the back of your dye packet).
- You can now dye your hair. For this tutorial I wanted my end result to be a gradual fade from pink to white. However if you want to dye the whole hank, you will not need a stand and can completely submerge the whole hank into the dye.
- For the gradual fade effect I dipped around half the hank into the dye, making sure to use the spoon to push it into the dye and getting it well saturated. As you may notice from the picture, the dye will seep up the hair, however this will add to the gradual fade of the dye to white. I then secured my hank to my handy banana tree to make sure the rest of the hank didn’t fall into the dye.

- The next stage is now down to personal preference, you can follow the instructions for how long to leave the hair in the dye for. However I have found to achieve the strongest and boldest colours, that leaving it in the dye overnight will give better results. I just make sure to poke it with the spoon a couple of times before leaving it to make sure the hair is well and truly submerged in the dye.

- Now take your hank of hair, you will probably want to wear a pair of gloves for this stage and remove your hank from the dye over the sink. DO NOT THROW AWAY THE REST OF THE DYE JUST YET!
- You now wash the hank of hair under cold water until the water runs clear. This will give you an indication of how well the hair has dyed, although be aware that wet hair is always slightly darker then the dry result. If you are happy with the result, you can either throw away the rest of the dye or use it for something else. If you are not happy you can repeat the previous step and place it back into the dye to achieve a darker/brighter colour. You may however want to gently dry the hank before you put it back into the dye, as wet hair will cause the dye to seep up the hair further than if it was dry. This is all down to personal preference.


- Once you are happy with the result, gently wash with baby shampoo and then dry the hair (you can either leave it to air dry, or use a hair dryer on a very low heat setting to speed up the process).

- You are now ready to use your hank of hair on your custom project :).

PLEASE BE AWARE, as with all dye there is a chance that your dyed hair may transfer on to light coloured projects or leech into the plastic of your doll / pony vinyl, and therefore it is recommended to either make sure your project is well sealed beforehand or to only use dyed hair on darker projects.
As you can see from pictures 4+5+6+7, I only dyed the hank one colour, however there is nothing stopping you dyeing the hair multiple colours. I have seen hair that has been dyed with 3 or 4 colours giving very dramatic and beautiful effects. Bear in mind that if you decide to dye more than one colour, that it is best to dry the hair in between each colour and also to start with your lightest colour first.
Remember dying nylon is all about having fun and experimenting 🙂
I hope you found this tutorial useful. Good luck and have fun.
Elise
Here is Elise’s reroot tutorial on video: https://youtu.be/WA159M7i2U8
Rerooting tools can be found here
Some photos from other dyeing projects.


